Installing the Crayon Syntax Highlighter Plugin.
Out of the box, WordPress does not allow you to display code beautifully. It will look like part of the text. We can fix this in a couple of minutes.
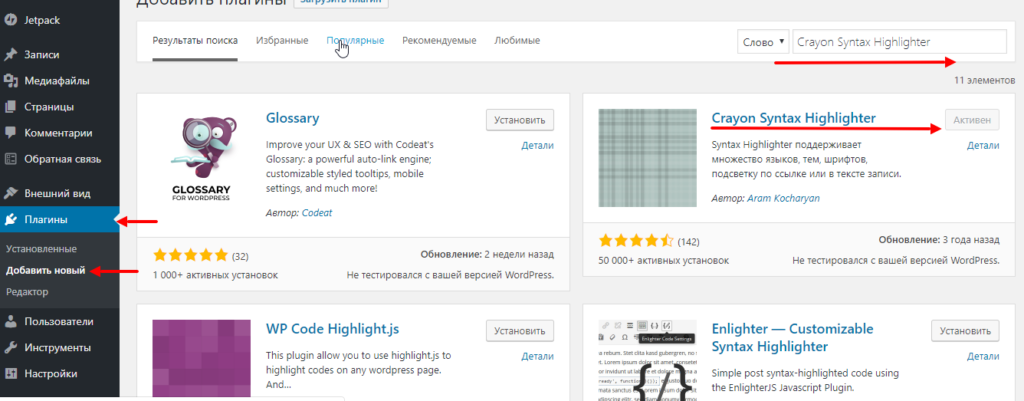
Log in to your WordPress site’s console, find the “Plugins” tab in the left menu, and select “Add New.” In the search box located in the upper right corner, type: Crayon Syntax Highlighter. Find the plugin in the search results and click “Install,” then click “Activate” after installation.
Configuring the Crayon Syntax Highlighter Plugin.
To configure, go to the “Settings” tab and select “Crayon”.
The plugin has quite a few settings, but they are not complicated and easy to understand.
Using the Crayon Syntax Highlighter Plugin.
To insert code, you need to click on the special button that appeared in the editor after installing the plugin.

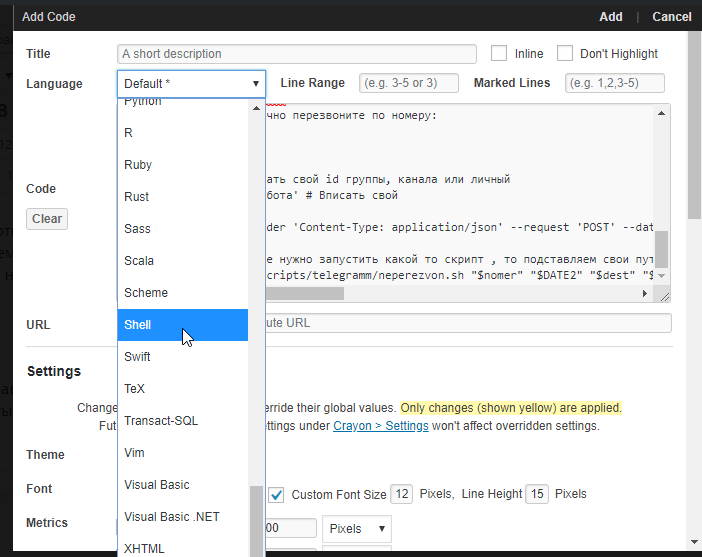
After clicking, a window opens where you paste the code that needs to be highlighted, in the dropdown menu “Language” select the language in which the code is written and click the “Add” button. If necessary, you can perform additional settings located below.
What I liked is that it works out of the box, there is an option to choose the language of the code being inserted, simple settings to understand, and the appearance.
The appearance of the code after insertion:
